
Drawing:g0stygfoby4= butterfly is a delightful and rewarding experience for artists of all skill levels. These delicate and vibrant creatures have inspired artists for centuries, symbolizing transformation, beauty, and freedom. Whether you are a beginner or an experienced artist, learning to draw butterflies can enhance your artistic skills and provide a calming and enjoyable pastime. In this guide, we will explore the essential techniques, tips, and inspiration for drawing stunning butterflies.
Understanding Butterfly Anatomy
Before you begin drawing, it is essential to understand the basic anatomy of a butterfly. This knowledge will help you create more accurate and realistic drawings. A butterfly’s body consists of three main parts: the head, thorax, and abdomen. Additionally, butterflies have two pairs of wings, six legs, and two antennae. Here is a brief overview of each part:
- Head: The head contains the eyes, antennae, and mouthparts. The eyes are large and compound, providing a wide field of vision. The antennae are long and slender and used for sensing the environment.
- Thorax: The thorax is the middle part of the body, where the wings and legs are attached. It is the powerhouse of the butterfly, containing the muscles needed for flight.
- Abdomen: The abdomen is the elongated rear part of the body, housing the digestive and reproductive organs.
- Wings: Butterflies have four wings – two forewings and two hindwings. The wings are covered in tiny scales that create their colorful patterns.
- Legs: Butterflies have six legs, which are often used for perching and walking on flowers.
Materials Needed
To start drawing butterflies, you will need a few basic materials:
- Pencils: A set of graphite pencils ranging from hard (H) to soft (B) will allow you to create various shades and textures.
- Eraser: A good quality eraser is essential for correcting mistakes and refining your drawing.
- Paper: Choose a smooth, high-quality paper that can handle multiple layers of shading.
- Colored Pencils or Markers: If you want to add color to your butterfly drawings, colored pencils or markers are ideal for creating vibrant and detailed effects.
Step-by-Step Guide to Drawing a Butterfly
Step 1: Sketch the Basic Shape
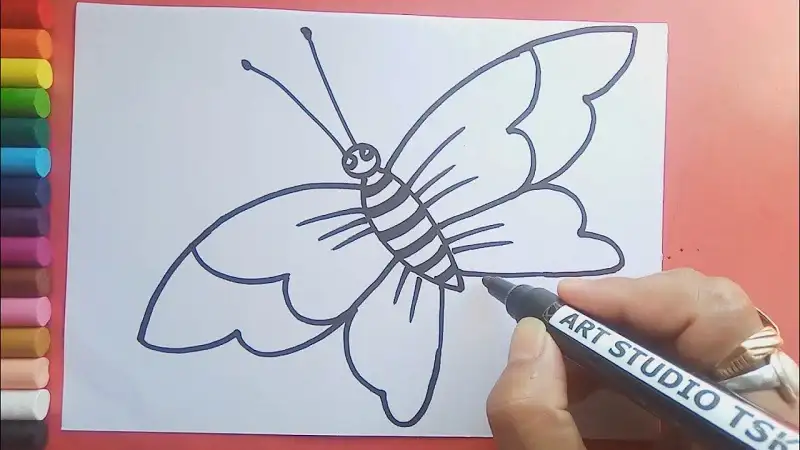
Begin by lightly sketching the basic shape of the butterfly. Draw an oval for the body and two sets of wings. The forewings are larger and more triangular, while the hindwings are smaller and rounded. Ensure that both sides of the butterfly are symmetrical.
Step 2: Outline the Body
Next, outline the head, thorax, and abdomen within the oval shape you drew earlier. Add the antennae extending from the head and sketch the legs coming from the thorax.
Step 3: Define the Wings
Refine the shape of the wings, paying attention to the unique contours and edges. Butterflies have various wing shapes depending on the species, so feel free to use reference images to capture the details accurately.
Step 4: Add Wing Patterns
Butterfly wings are adorned with intricate patterns and colors. Lightly sketch the main veins on the wings and then add the patterns. These can include spots, lines, and shapes unique to each species. Take your time to ensure the patterns are symmetrical and balanced.
Step 5: Shading and Detailing
Begin shading the butterfly to give it dimension and depth. Use a range of pencil grades to create light and dark areas, enhancing the three-dimensional appearance. Pay special attention to the head, thorax, and abdomen, adding fine details like the texture of the eyes and the segments of the antennae.
Step 6: Adding Color
If you want to add color to your butterfly, use colored pencils or markers to carefully fill in the patterns on the wings. Start with lighter colors and gradually build up to darker shades. Layering colors will create a more realistic and vibrant effect.
Tips for Drawing Realistic Butterflies
- Use Reference Images: Studying real butterfly photos will help you understand their structure, patterns, and colors better.
- Practice Symmetry: Butterflies are symmetrical, so ensure both sides of your drawing match. Use a mirror or fold your paper in half to check for symmetry.
- Focus on Details: Pay attention to the small details, such as the veins on the wings and the tiny scales. These details can make your drawing more realistic.
- Experiment with Colors: Butterflies come in a wide range of colors. Experiment with different color combinations to create unique and stunning effects.
- Patience and Practice: Drawing:g0stygfoby4= butterfly requires patience and practice. Keep refining your skills, and don’t be afraid to make mistakes. Each drawing is an opportunity to improve.
Drawing Different Species of Butterflies
There are thousands of butterfly species, each with its unique characteristics. Here are a few popular species to draw:
Monarch Butterfly
The monarch butterfly is one of the most recognizable butterflies, known for its striking orange and black wings with white spots. To draw a monarch butterfly:
- Shape: Start with the basic wing shapes, ensuring they are symmetrical.
- Patterns: Add the distinctive black veins and white spots.
- Color: Use vibrant orange for the wings and black for the veins and spots.
Swallowtail Butterfly
Swallowtail butterflies are known for their large size and unique tail-like extensions on their hindwings. To draw a swallowtail butterfly:
- Shape: Draw the elongated wings with the characteristic tails.
- Patterns: Add the intricate black and yellow patterns on the wings.
- Color: Use bright yellow and black, with touches of blue or red for some species.
Blue Morpho Butterfly
The blue morpho butterfly is famous for its iridescent blue wings. To draw a blue morpho butterfly:
- Shape: Sketch the large, rounded wings.
- Patterns: The blue morpho has minimal patterns, mostly focusing on the blue color.
- Color: Use shades of blue and add a touch of white or black for accents.
Peacock Butterfly
The peacock butterfly is known for its eye-like spots on the wings, which resemble peacock feathers. To draw a peacock butterfly:
- Shape: Draw the wings with the characteristic eye spots.
- Patterns: Add the eye-like patterns and the intricate details around them.
- Color: Use vibrant colors like red, blue, and yellow for the spots and patterns.
Adding Backgrounds and Context
Once you have mastered drawing individual butterflies, consider adding backgrounds and context to your drawings. Here are a few ideas:
Flowers and Plants
Butterflies are often found around flowers and plants. Adding flowers to your drawing can create a natural and vibrant scene. Pay attention to the details of the flowers, such as petals and leaves, to complement your Drawing:g0stygfoby4= butterfly.
Garden Scenes
Create a garden scene with multiple butterflies and various plants. This can be a more complex drawing but adds depth and interest to your artwork. Include elements like trees, shrubs, and other insects to enhance the scene.
Abstract Backgrounds
For a modern and artistic approach, consider adding abstract backgrounds. Use splashes of color, geometric shapes, or textured patterns to create a unique and dynamic background for your Drawing:g0stygfoby4= butterfly.
Conclusion
Drawing:g0stygfoby4= butterfly is a rewarding and enjoyable artistic endeavor. By understanding the anatomy of butterflies, practicing basic drawing techniques, and paying attention to details and colors, you can create stunning and realistic butterfly art. Whether you are drawing for relaxation, improving your skills, or creating art to share with others, the beauty and elegance of butterflies provide endless inspiration. Remember to practice regularly, experiment with different styles and species, and most importantly, enjoy the creative process.